I wanted to simplify the instructions for finishing the Acorn from Prairie Schooler Acorns ~ Leaflet #65 so I came up with the following instruction.
Supplies:
- PS Acorns Leaflet #65
- Template plastic
- Acorn backing fabric
- Cap backing fabric
- Fusible interfacing
- Cross stitch fabric
1) Using template plastic make a full size:

~ ACORN TEMPLATE
~ CAP TEMPLATE
Do this by tracing the pattern and then flip the template plastic over and trace it again.

NOTE: When tracing the Acorn pattern trace up to the "FELT LINE", not the line above that.
2) ACORN Template: Measure the width and height.
From Acorn backing fabric cut one (1) piece equal to:
Acorn height + 1.5" x Acorn width + 2"
3) CAP Template: Measure the height.
From Cap fabric cut two (2) pieces equal to:
Cap height + 1.5" x Acorn width + 2"

4) Stitch one Cap piece to one Acorn Backing piece leaving a 2" opening in the
center.

5) Cut a piece of cross stitch fabric to the same measurements as the Acorn backing fabric (step #2) and zig zag raw edges. Stitch the 2nd Cap fabric piece to the cross stitch fabric piece.
NOTE: Do not leave a 2" opening when stitching these two pieces together.

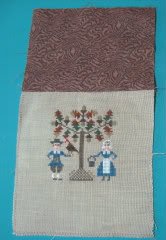
Front and Back pieces of the Acorn
6) Find the center of the cross stitch fabric and run a vertical basting stitch.

7) Calculate the cross stitch design area (make sure it will fit inside the Acorn area) and determine the top stitching edge. Stitch a horizontal basting line.

8) Use the basting stitch as a guide for centering, stitch the design.
9) Cut one piece of fusible interfacing equal to the measurement of the Acorn
backing fabric found in Step #2.


Press interfacing to the wrong side of the cross stitched piece.
10) Place the Acorn template onto the wrong side of the stitched piece. Align the top edge with the seam allowance and center over the design. Trace around the template.

11) Place the Cap template onto the wrong side of the cap fabric, aligning the
bottom edge with the seam allowance, and trace.


12) Place the backing piece and front (stitched) pieces right sides together, matching the seam allowance. Pin and stitch on traced line.

13) Trim 1/4" from stitch line, clip curves. Turn through the 2" opening on the back side.

14) Press and firmly stuff. Hand stitch opening closed. Attach a bow around the stem.


COMPLETED ACORN
